O.k. all ..here it is!! My first tutorial....I hope it all makes sense...please let me know if I need to change anything to make it clearer....
For demonstration purposes I am going to show the basics to make a small square and you can adjust for a larger piece later...
This is in U.S. crochet terms... I am using 4ply worsted weight yarn....what I call regular old basic everyday yarn.... and for this I used a ( I ) hook...
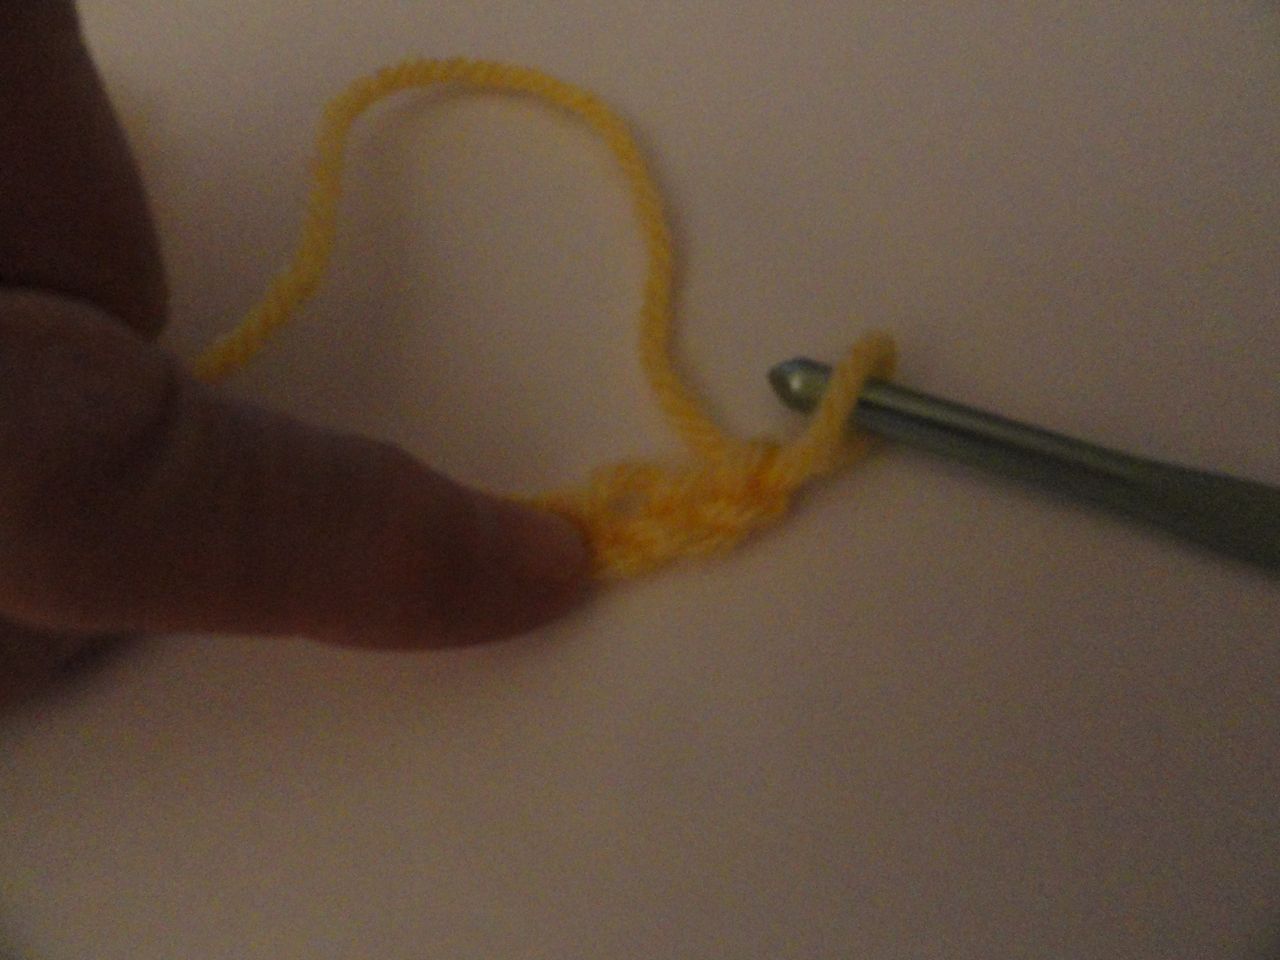
Chain 26.
The first row is a row of Half double crochet....(wrap once and pull through all 3 loops.)
So. Chain 26 then hdc in the third chain from the end.
Hdc: wrap once put into chain
and pull through all three
finished stitch. one hdc made
first row of hdc.... 23 in all
chain 1 and turn...
crochet 5 single crochets in the next 5 stitches
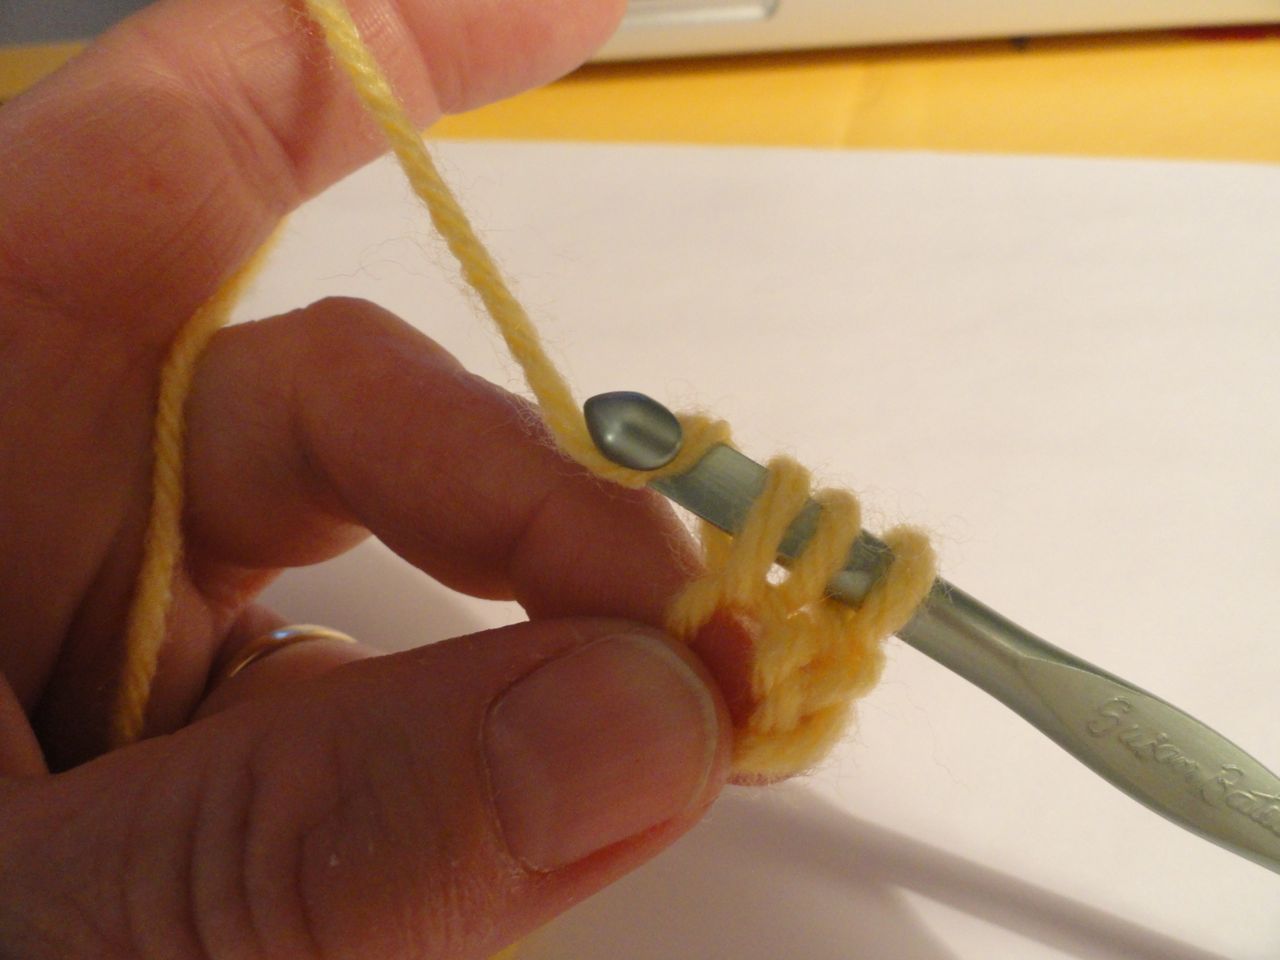
Now your first bobble. wrap as if you were going to do a double crochet
go in to the next stitch...( st.# 6) and pull through just the first 2 loops
two left on
wrap as if you were going to do another dc....insert back into stitch #6 and pull through two loops
now you will have 3 left on your hook
do this in the same stitch( #6) for a total of 5 times . you will have now 6 loops on your hook
Wrap and pull through all 6 loops
first bobble made
now sc into stitch #7
now it pops! sc in the next two stitches for a total of 3 sc after the bobble...then do another bobble and sc 3 to the last 5 stitches...sc in the last 5
this is what you will have now...5 sc on one side ..4 bobbles and 5 sc on the other side with 3 sc between each bobble
on your last sc of the row you will add a new color if you want the rainbow effect.
leave the last sc incomplete with just two loops on
pull in your next color
and chain 1
then tie your new color on .....if your leave the hook in it makes it much easier to tie...
this method of color changes moves you into a new color evenly
after you have ch 1.... turn and sc in every stitch across
for a total of 23 sc's
ch 1 and turn
sc in first 3 sc's
on stitch #4 you will do your bobble stitch.....
wrap insert into the stitch and pull through 2 loops a total of 5 times
when you have 6 loops pull through all 6
bobble complete
sc in the next 3 sc's ( do not sc in the same stitch as the bobble..sc into the stitch after and then the next two for a total of 3 sc's )
then bobble .....3 sc.....bobble... 3 sc to the last 3 stitches...sc in the last 3 st.
change colors on your last sc... ch 1 and turn sc all the way across for 23....ch1 and turn
sc into the first 5 sts.....bobble st ..3sc bobble to the last 5 stitches.... you will repeat rows 1 - 4 until done..
In order to have a nice neat border on both sides....one bobble row starts and ends with 5 sc and the next bobble row starts and ends with 3 sc.
you can start your first bobble row with either the 5 row or the 3 row just make sure your next bobble row is the opposite.
I do hdc as my first row because it is firm but a little bigger that sc...you can do double crochet and use double crochet between the bobble rows....but your bobble rows must be sc sc sc bobble sc sc sc bobble to the last 5 or 3 which ever you chose as your first bobble row.
well ! there you are!!!! I hope it is clear....let me know I am happy to answer any questions!!!


Looks pretty good!! I'm amazed! I will have to set my laptop up where I can work with some yarn and give this the good old college try! Thanks so much!
ReplyDeleteI love the colors and you've made this looks so easy--However, I've tried it and for me, it isn't, so I'll just watch you create, okay?
ReplyDelete:-)
Many thanks - i'll have a go at this at the weekend - I can honestly say that this is the best tutorial I have EVER seen! xxxxx
ReplyDeleteoh my gosh....thank you so so much...I was so worried that I was the only one who could understand it! Your a love!!
DeleteWow! That posting has taken a lot of effort but thanks for taking the time, I'm definately going to have a go. Now I have a jumper for my nephew lined up, some socks because of another blogging lady and now a bobble cushion I have in mind - there are just not enough hours in a day !! :-)
ReplyDeleteI totally agree...the days need to be at least 36 hours long!! Then I might have a chance at finishing something!!!
ReplyDeleteI shall be printing off the instructions and having a go at it tonight, while watching someone get murdered in Midsomer. A bit like those French women who knitted at the guillotine, gruesome woman that I am. The instructions look easy enough for me and I'm easily confused by all instructions.I will let you know how things turn out. Thanks Bee.
ReplyDeleteI am very impressed, I plan to take crochet lessons this year so will return to this post. Happy New Year! Jude x
ReplyDeleteThank you so much for this tutorial. I'm going to attempt it this week :)
ReplyDeleteYay! Thanks for visiting my blog & your kind comments on my cushion. It's all due to your tutorial. I'm looking forward to seeing those bunnies :)
ReplyDeleteThat's a great tutorial. Thank you for sharing.
ReplyDeleteAs for the cats... I love your style. We have 5 at the moment and they are addictive and lovely and amazing!
I was browsing through and came across this tutorial and blog of yours. Lovely and very creative I must say! Looks like a very addictive stitch and I am surely going to try this sooooon. Thanks and keep posting more.
ReplyDeleteLove,
Resmi
I am just teaching myself to crochet so i have to give this pattern a try, at least it is less boring than doing SQUARES. Love the blog i will keep looking, many thanks.
ReplyDeleteLovely! I just completed mine! Can you explain how you managed to weave the ends in?
ReplyDelete